Module 9: READING FROM AND WRITING TO FILES
Lesson Objectives
After reading this lesson, you should be able to:
change the current directory,
make directories (folders),
remove directories (folders),
loop through directory structures.
How do I set the current working directory for MATLAB?
Setting the working directory/folder in MATLAB means you are telling
MATLAB where you want it to look for and work with files. That is, the
working directory is the directory/system folder from which you are
currently working. The current directory is usually set to the location
of your last active m-file (the last one you ran). To view or output
your current working directory, use the
pwd (“print
working directory”) command. To change the working directory, use the
cd (“change
directory”) command.
You can use the function
dir()
to create a directory struct
array. This
struct array will then have file attributes (information) such as names
or size for that directory, which can be referenced via dot notation
(e.g., myFolder.name).
dir()
is useful if your m-file is in a different directory (folder) than the
data files you want to access, which we will demonstrate in Example 2.
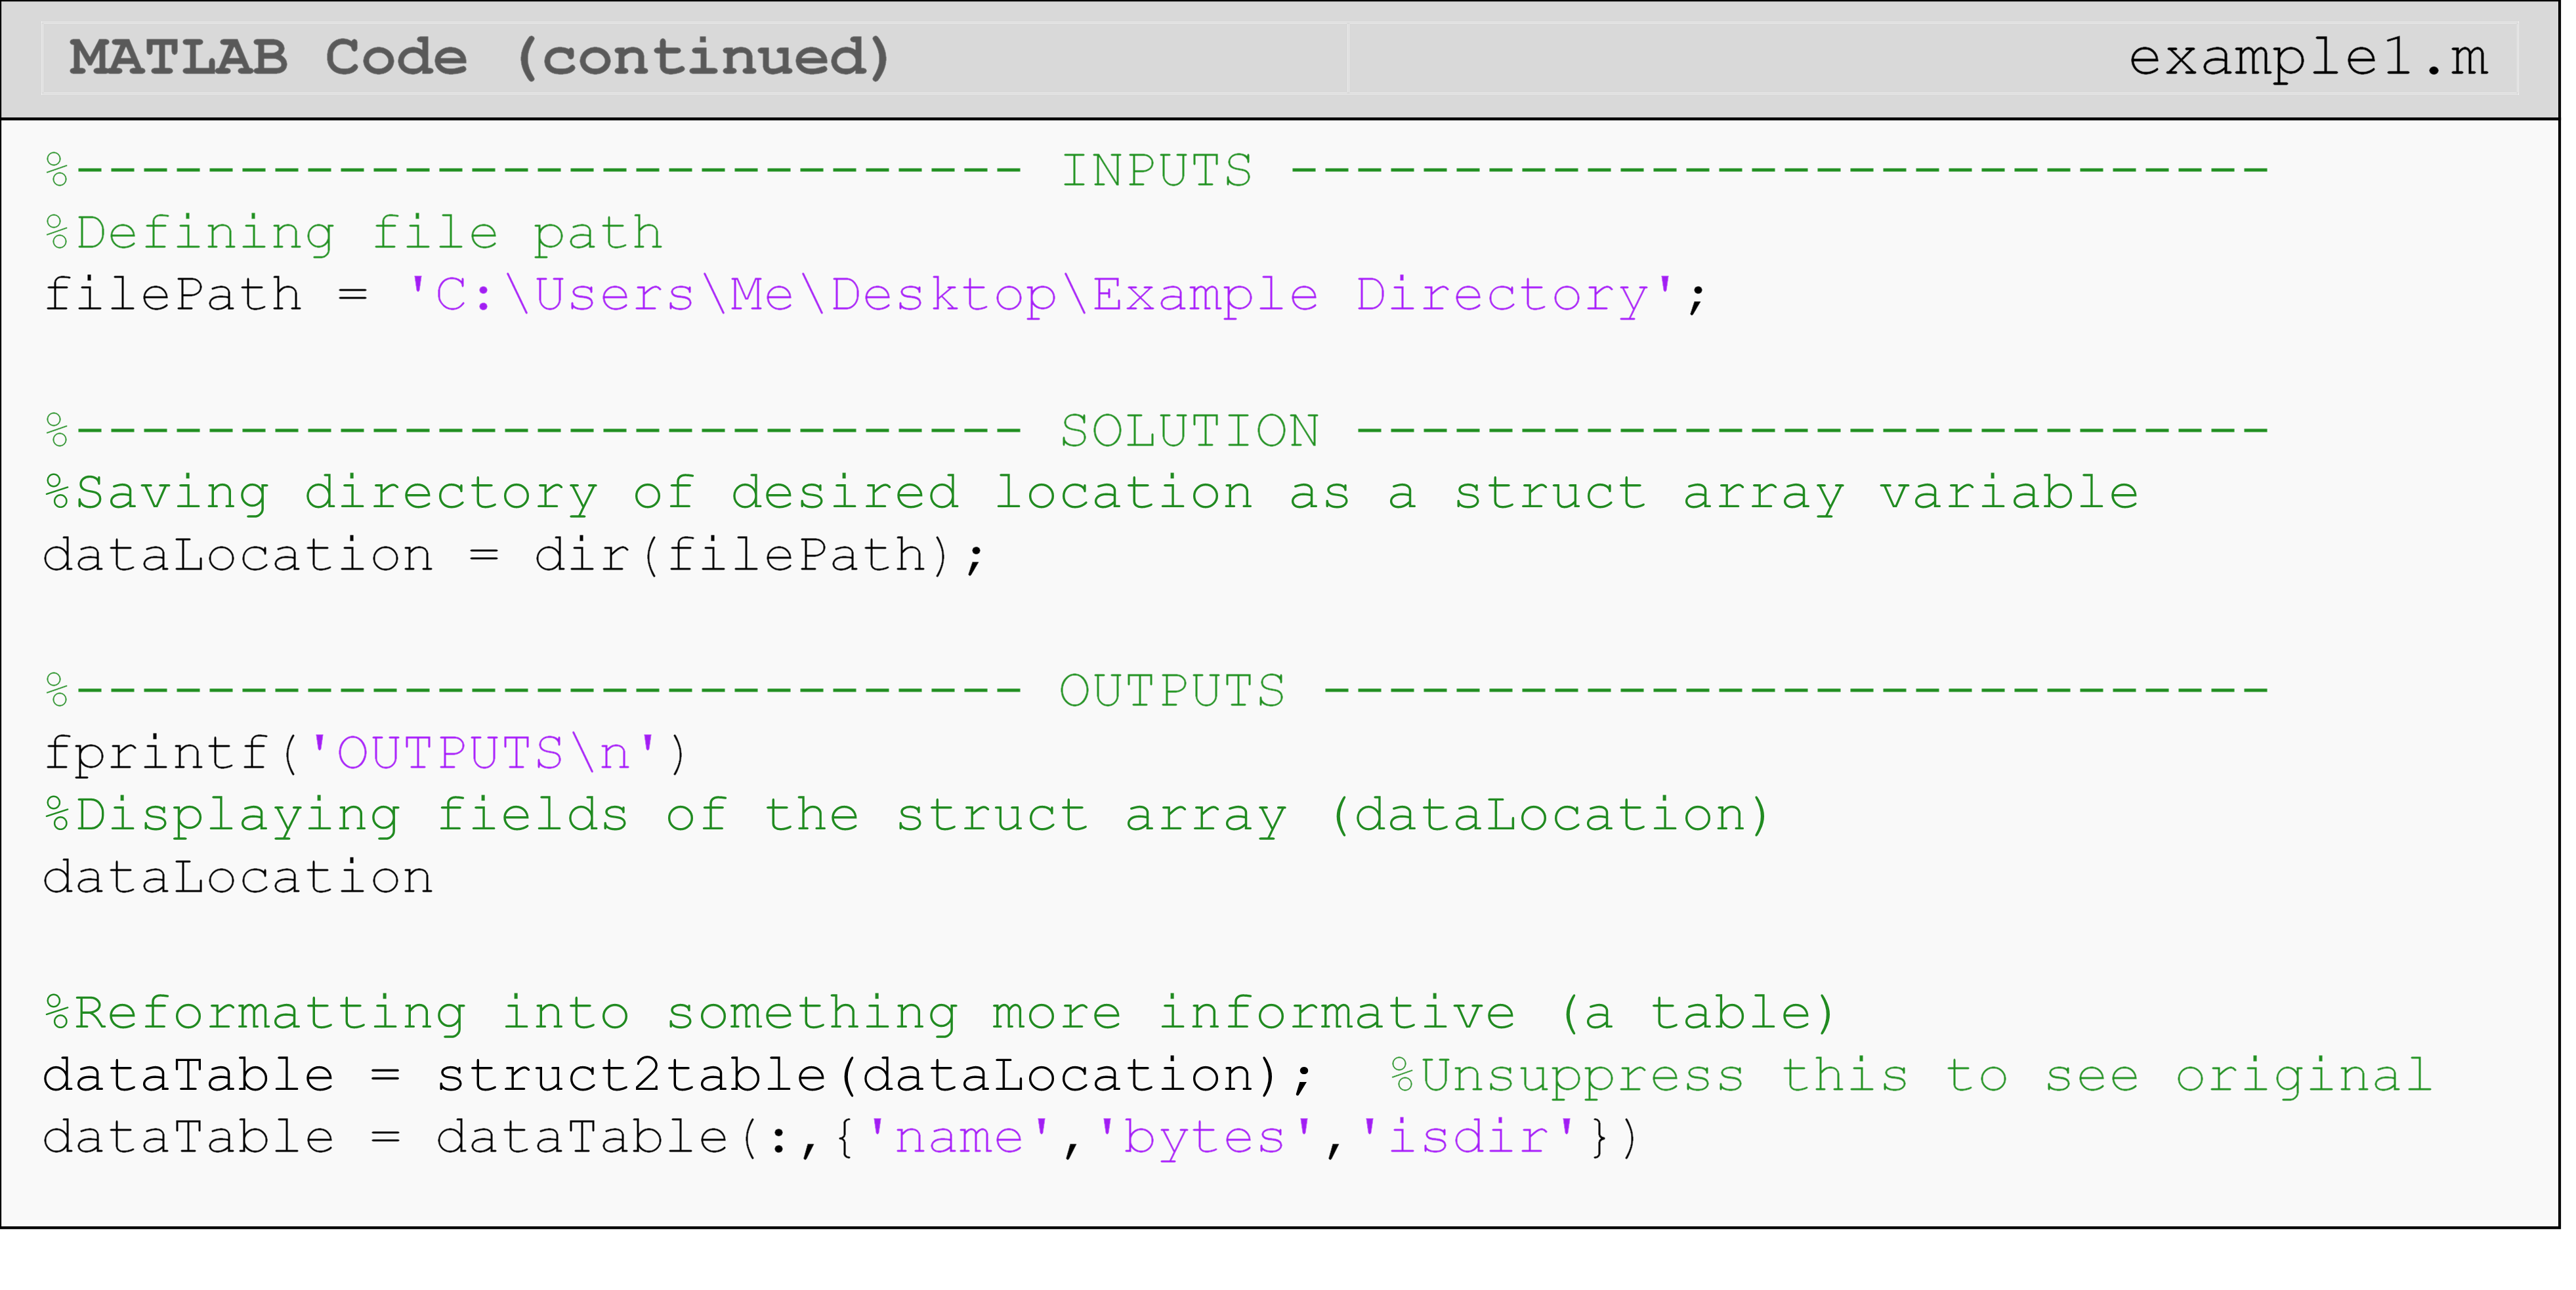
Example 1
Create a struct variable containing a directory’s information. Display the name, bytes, and isdir fields to the Command Window.
Solution

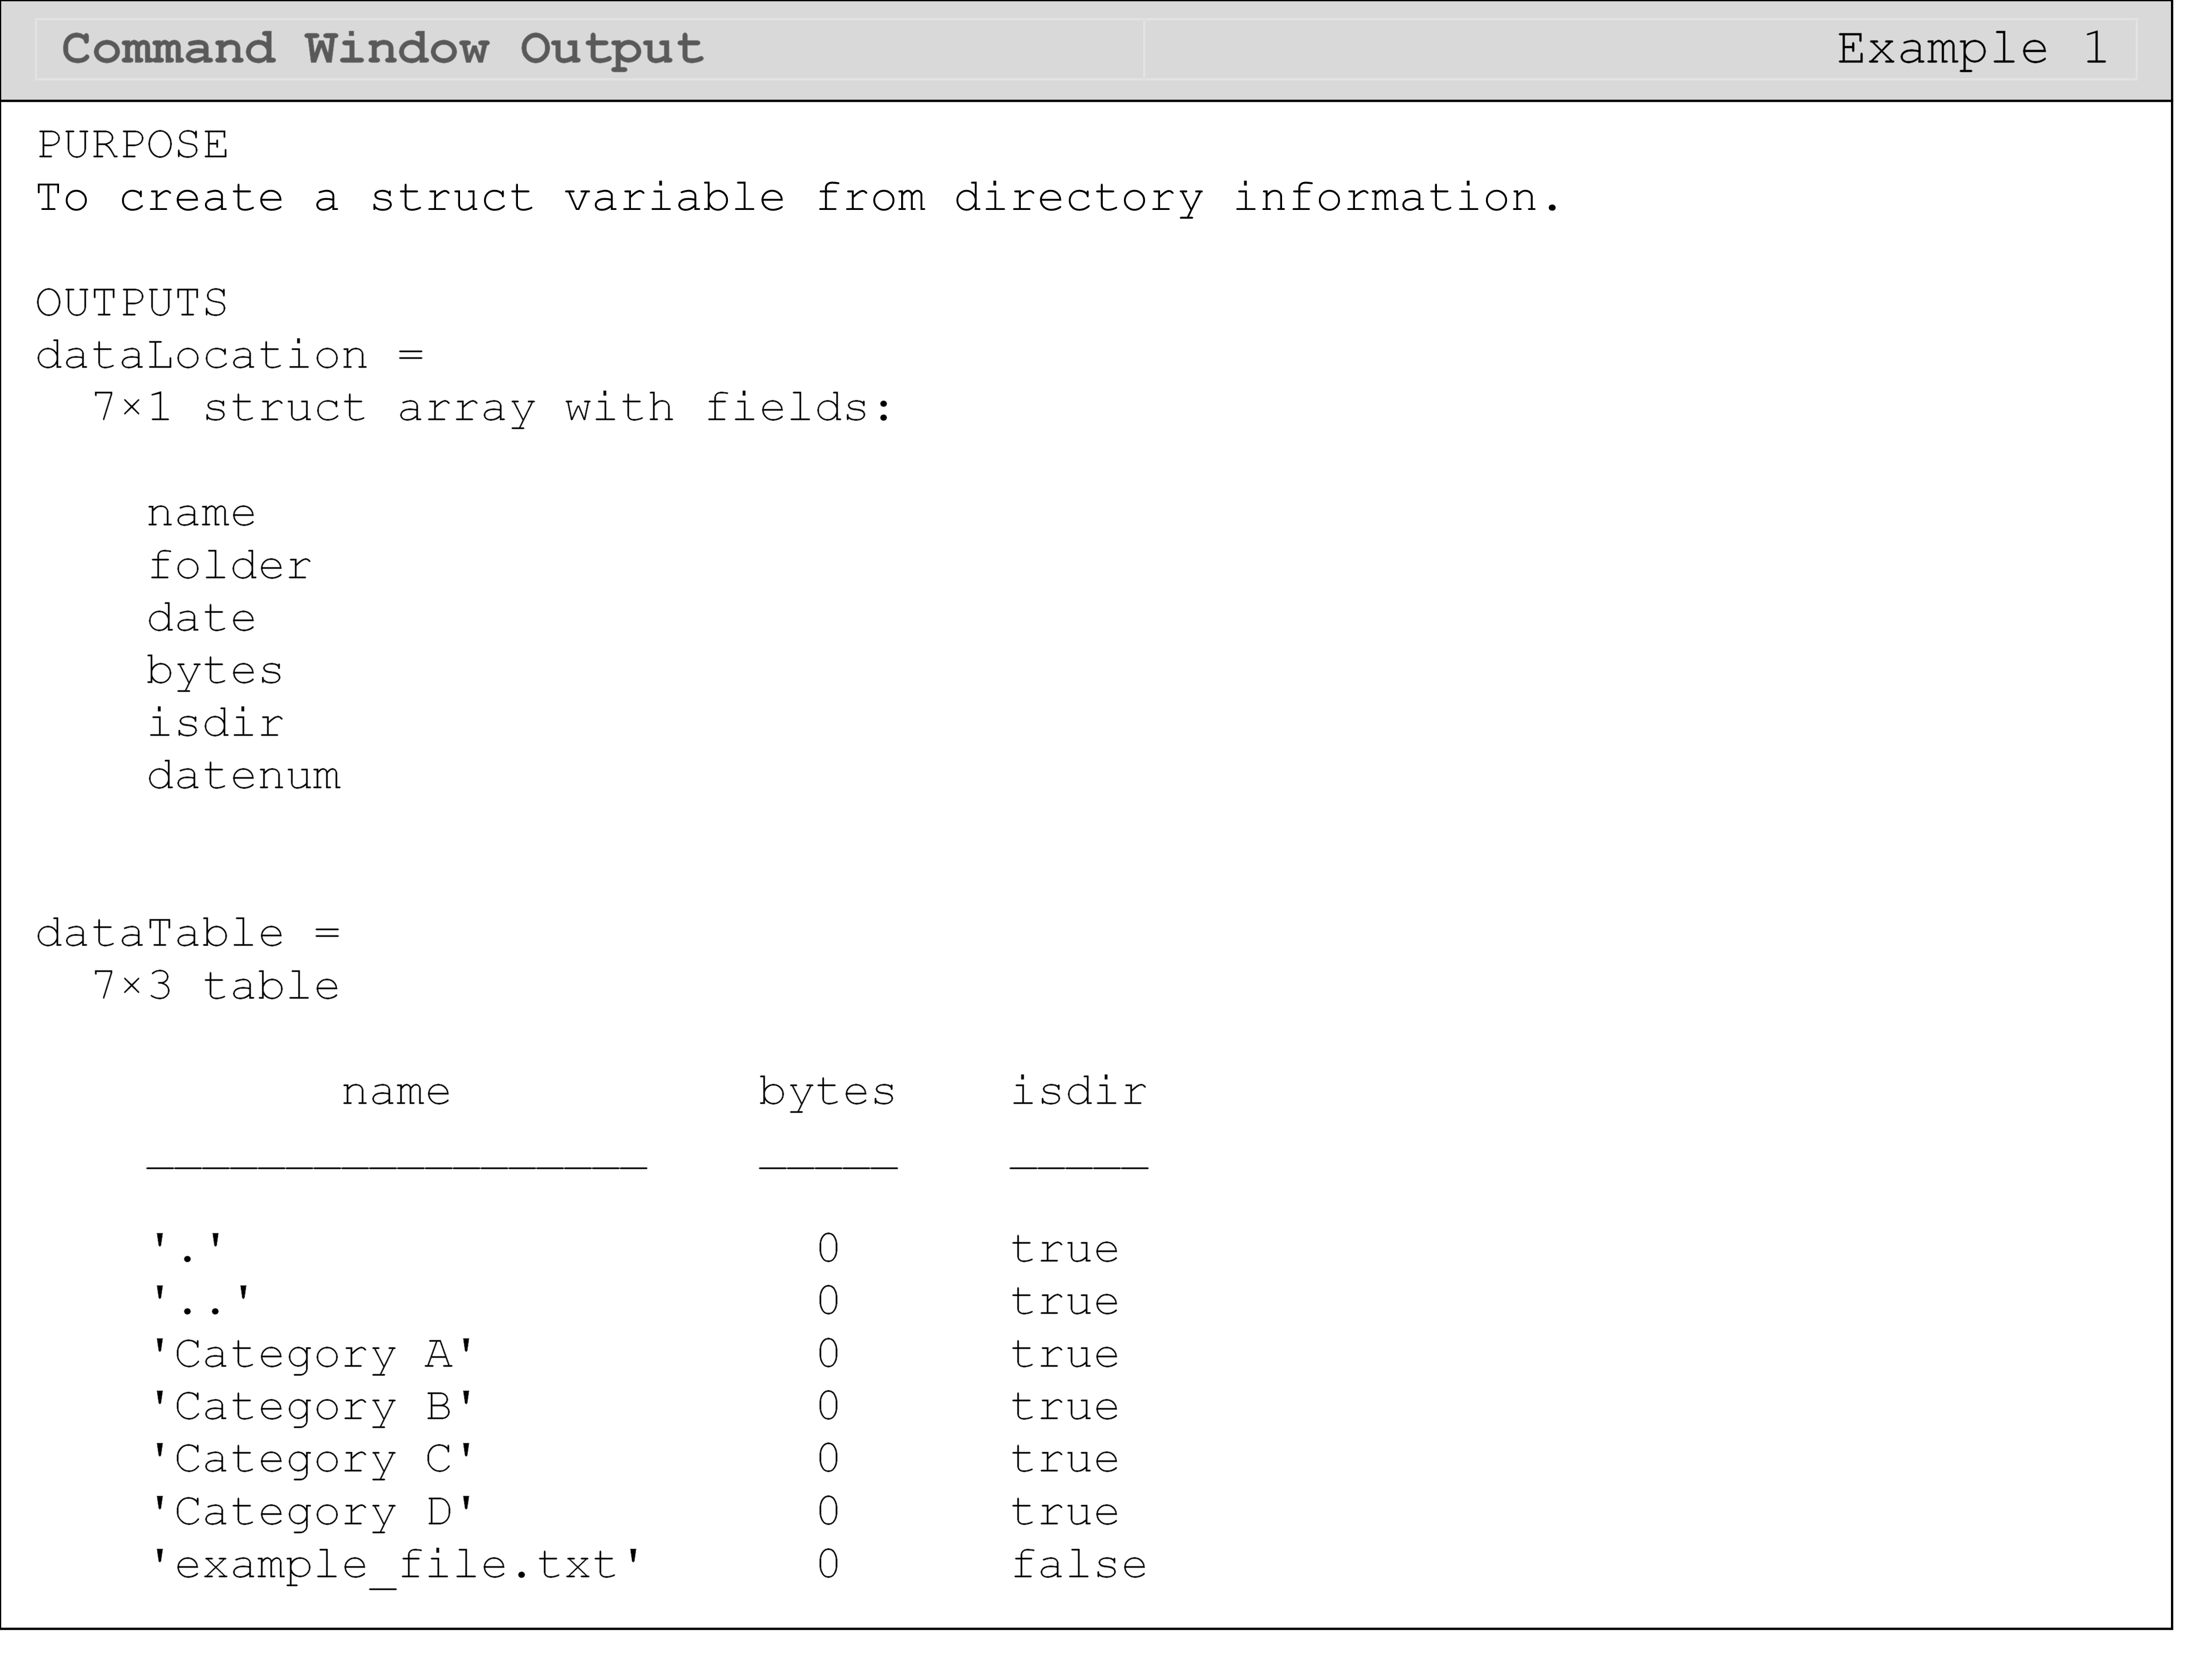
The first output we see from Example 1 are the file attributes contained
in the struct
array
(dataLocation) that we created using
dir().
Next, we can see the outputs from the name, bytes, and isdir fields of
the struct
array
(dataLocation) in table form. For the list of names, notice the first
two entries are “.” and “..”, which are hidden folders in Windows. If
you are on macOS watch out for “.DS_Store” hidden files. That means you
will not be able to see them if you look in that directory (see Figure
2) unless you have specifically told Windows to show you those hidden
folders. Most of the time, you do not have to worry about or deal with
hidden files and folders. The exception is when you want to loop through
all of a directory’s contents.
The directory structure used in Examples 1, 2, and 3 (see Figure 2) has a parent directory called “Example Directory” (a folder containing all the data). Within the parent directory, there is a folder for “Category A” and one for “Category B”. Finally, within each “Category”, there are three group folders: “Group 1”, “Group 2”, and “Group 3”. An example file path would be: “C:\Users\MechPlus\Example Directory\Category A\Group 2\file1.txt”.
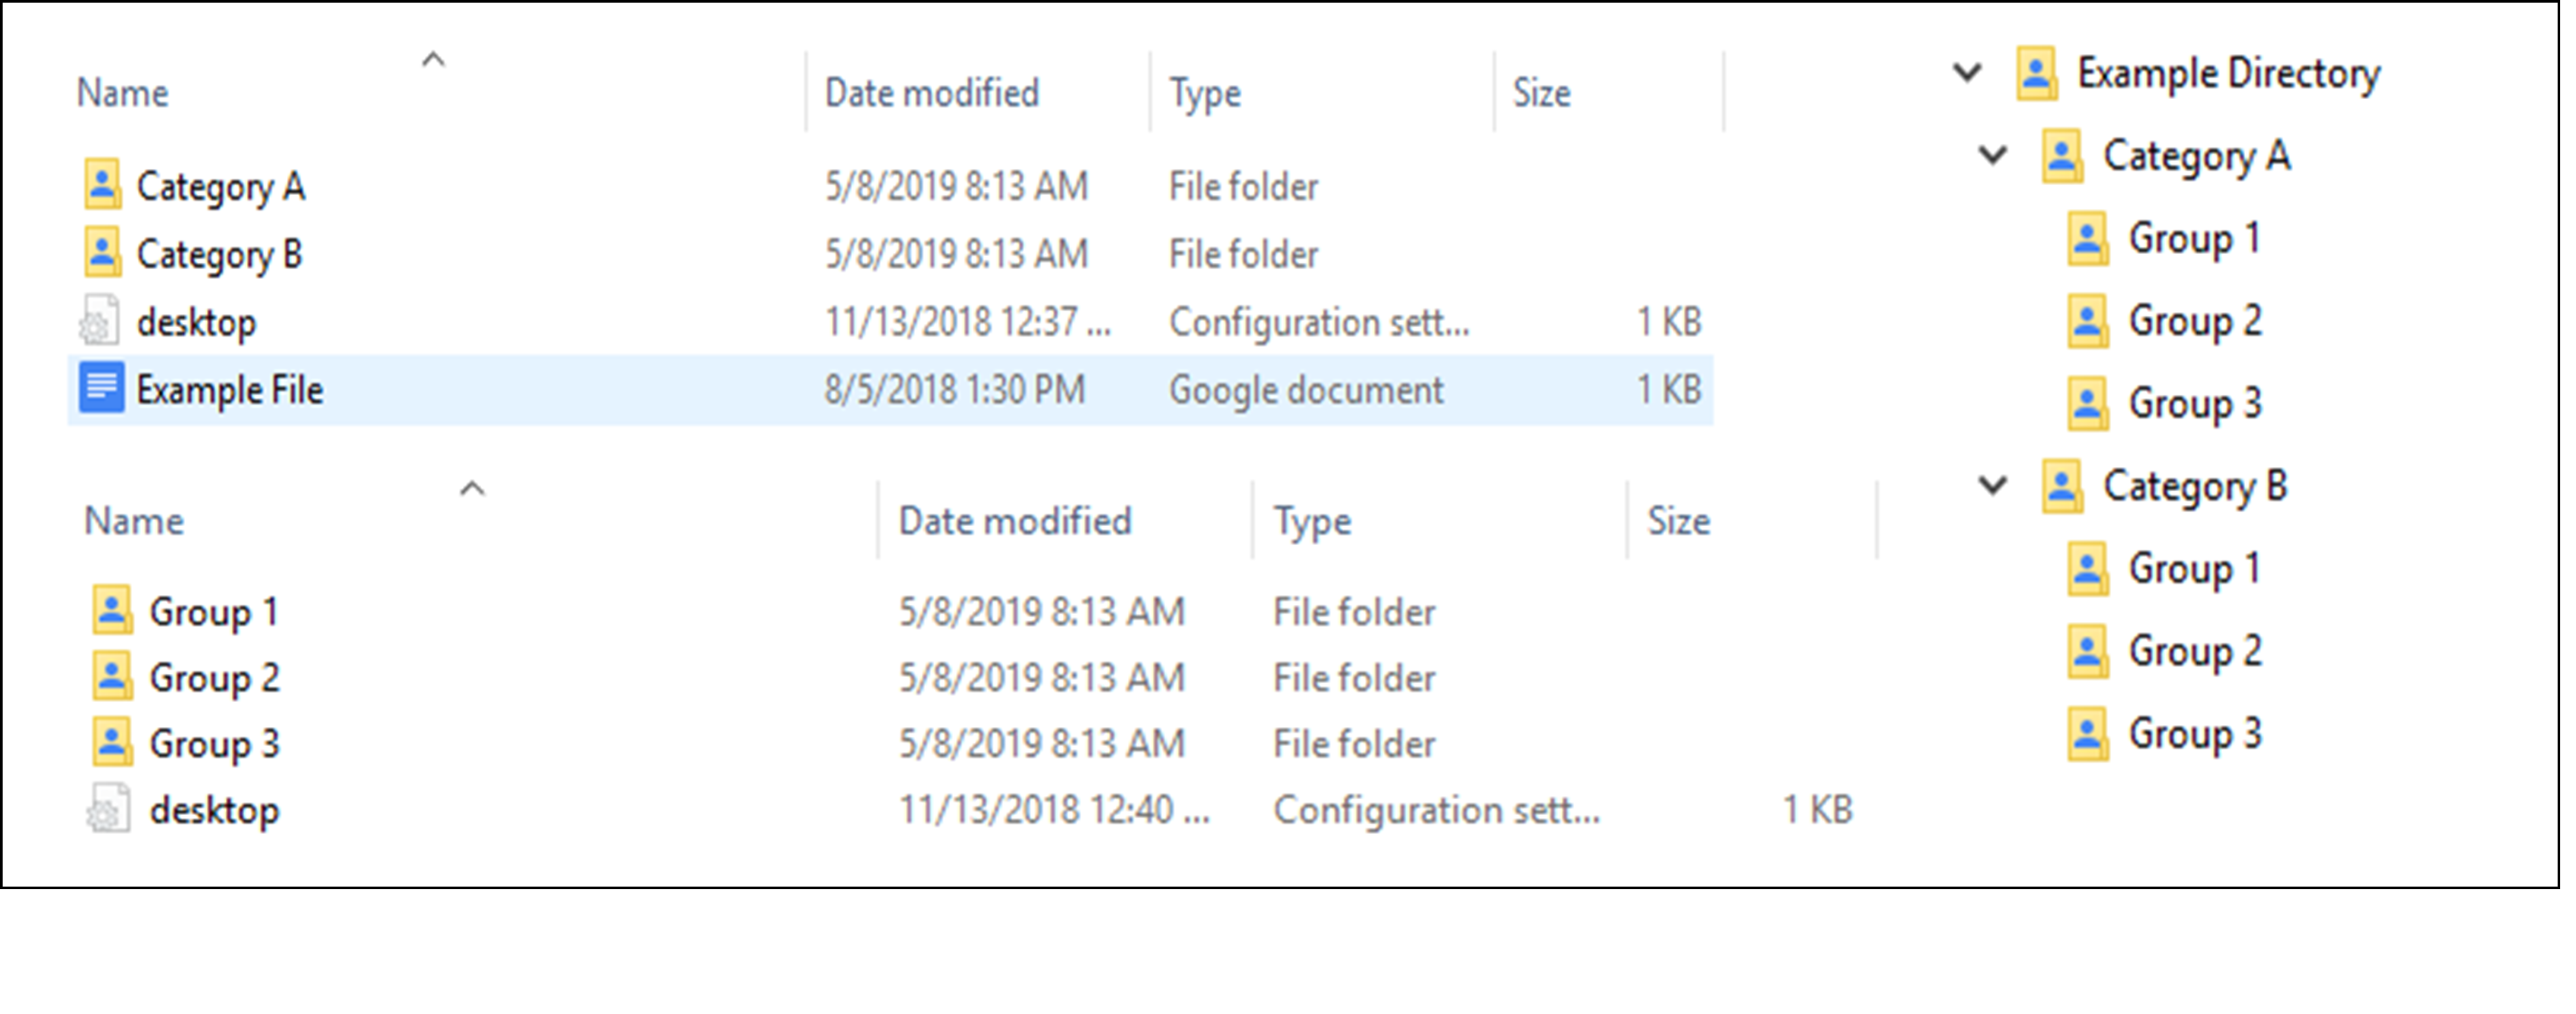 Figure 2: File structure used in Examples 1, 2, and 3. On the left,
you can see the folder contents view. On right, is a tree view for the
same directories.
Figure 2: File structure used in Examples 1, 2, and 3. On the left,
you can see the folder contents view. On right, is a tree view for the
same directories.
How can I loop through the contents of a directory?
Sometimes you will have to look through and extract data from many files in many directories. To automate the process of looking through and opening files and folders, we can use the name field of a directory struct array, which gives the user the folder/file name of the item. Note that this field itself is an array with a size equal to the number of items contained in the directory. For instance, in Example 1, the field was an array of six elements (names). Example 2 demonstrates how to use this field to loop through any directory’s contents without knowing the contents’ folder/file names.
In our case, we have three directory levels to loop through (“Category”, “Group”, and the files in each group). To access all of the files and folders contained in each category, we will need three loops: one for each level. We mimic the structure of the directory by nesting the loop for “Group” within the loop for “Category” and the loop for the files in each group within the loop for “Group”.
 Important Note: If you are using
MATLAB on Windows, you must account for any hidden files and folders
when automatically searching/looping through directories.
Important Note: If you are using
MATLAB on Windows, you must account for any hidden files and folders
when automatically searching/looping through directories.
Example 2
Loop through and read all the files contained in the directories shown in Figure 2.
Solution
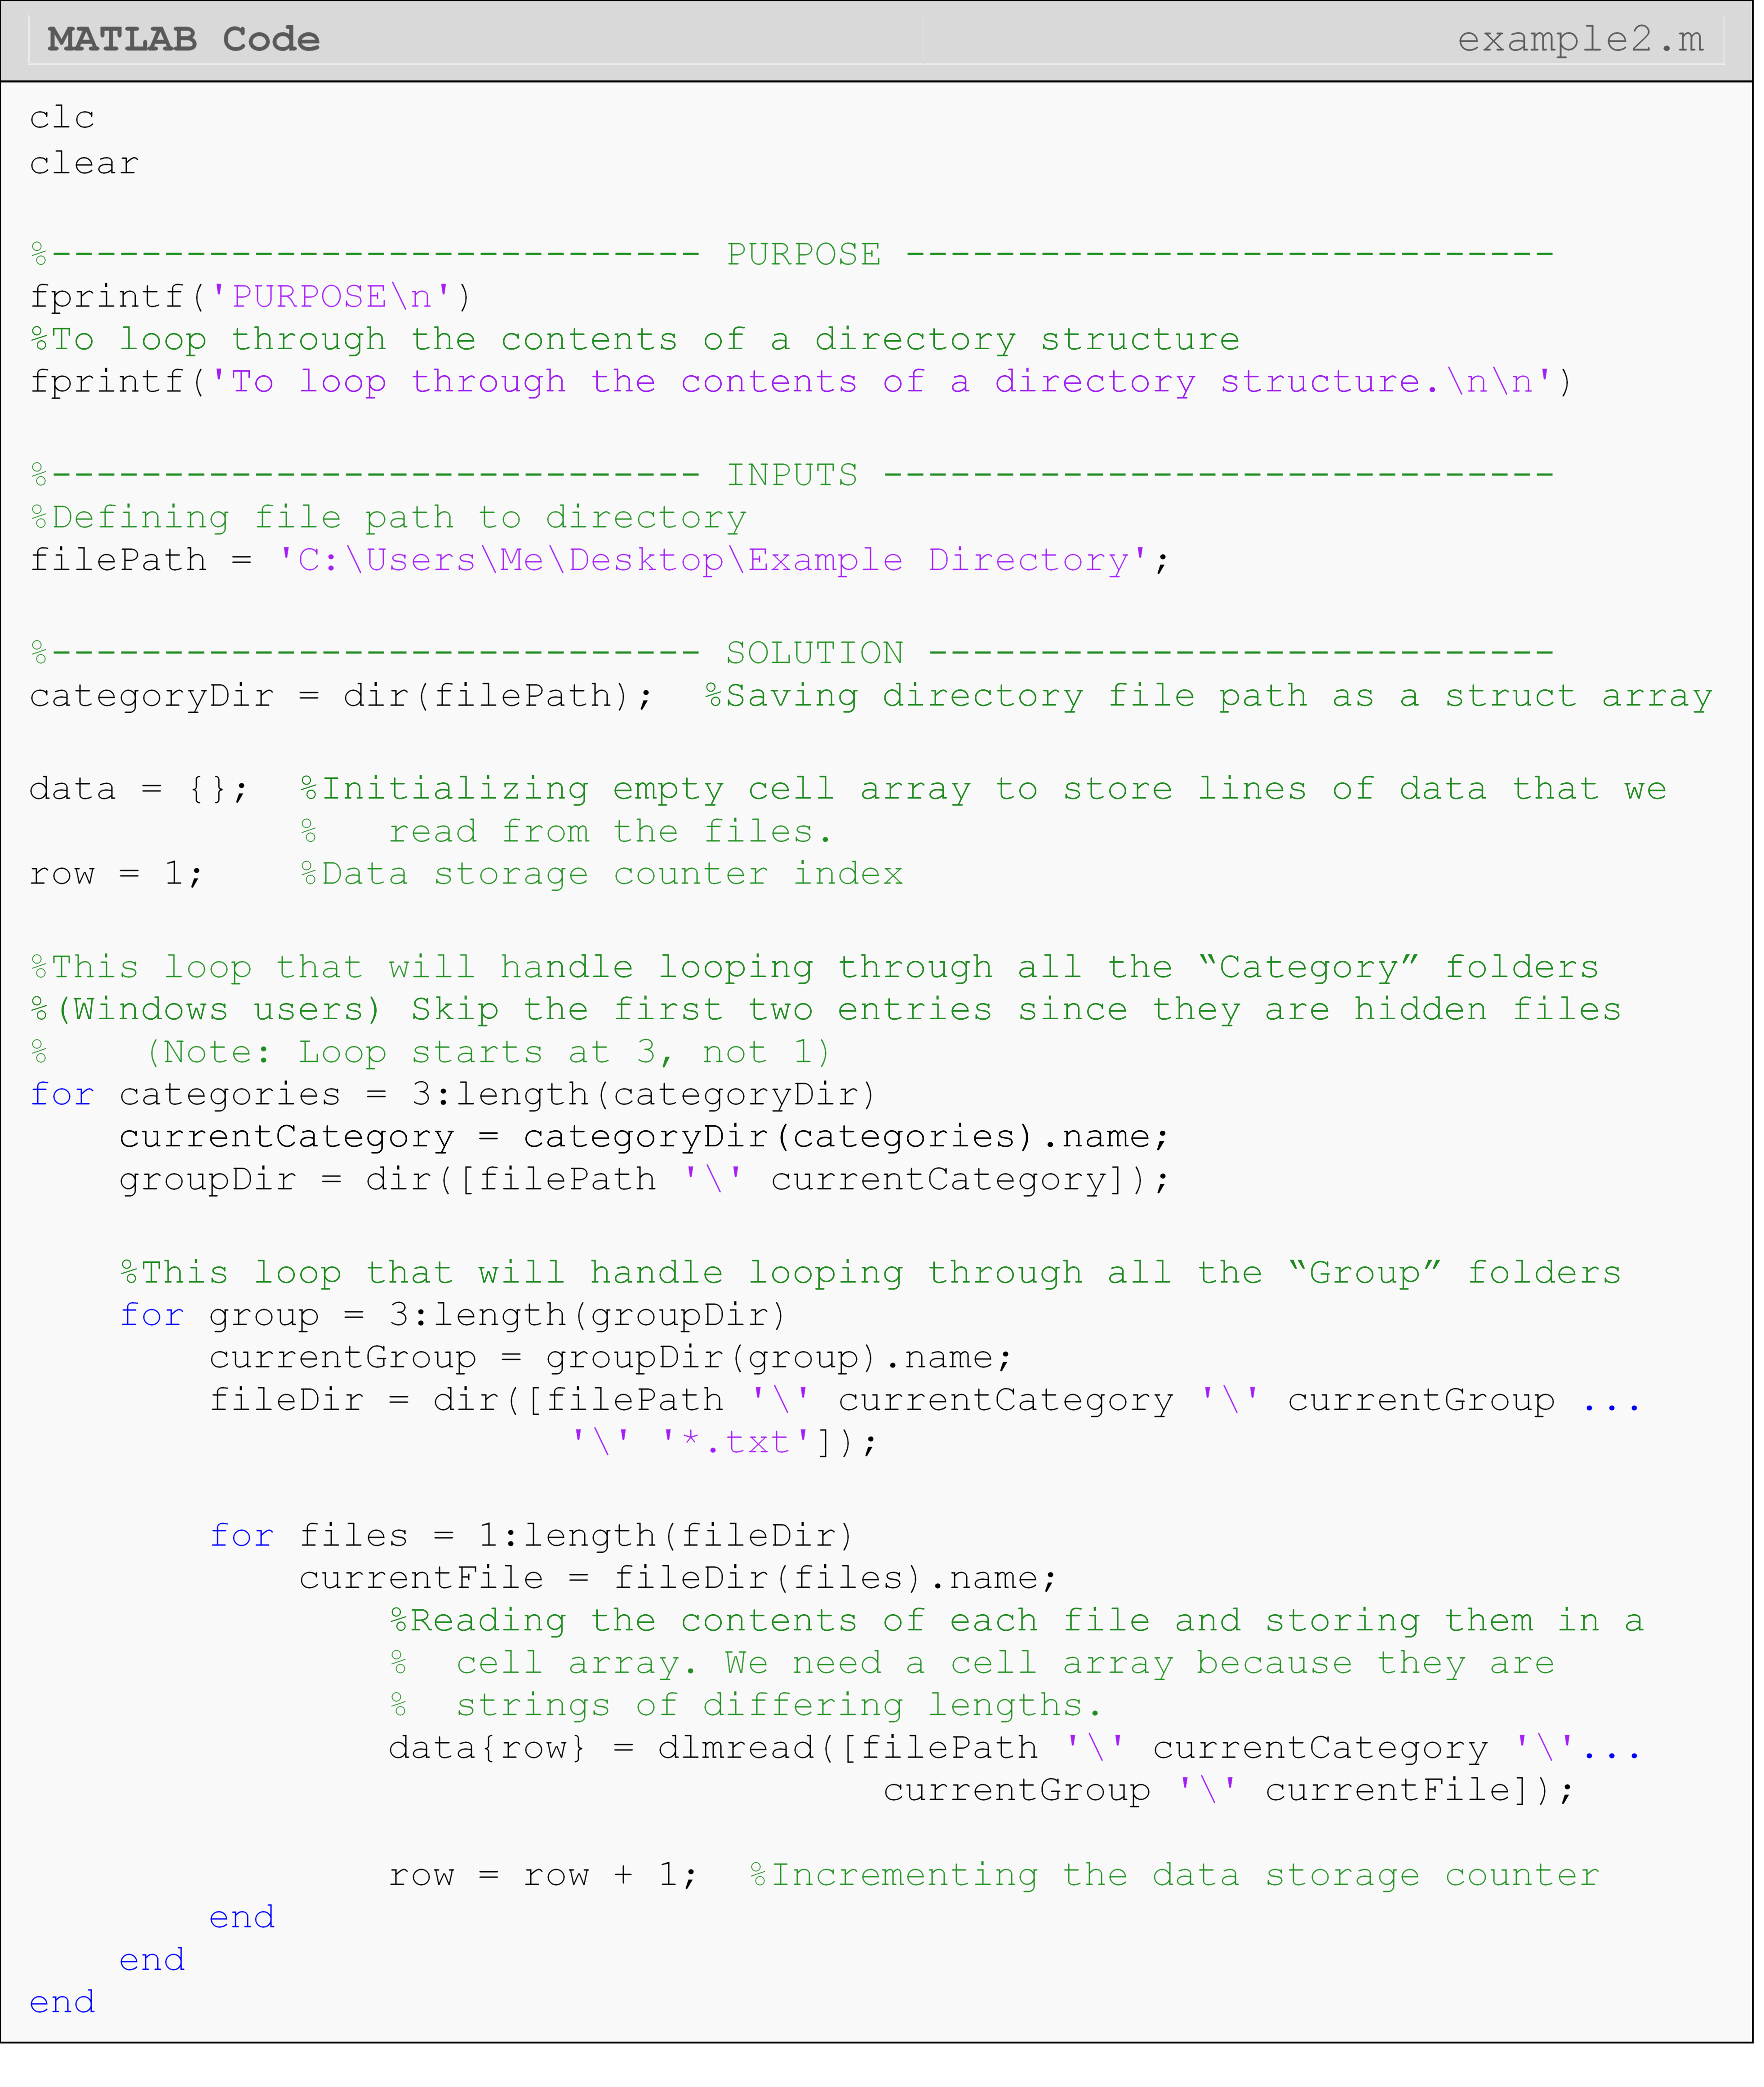

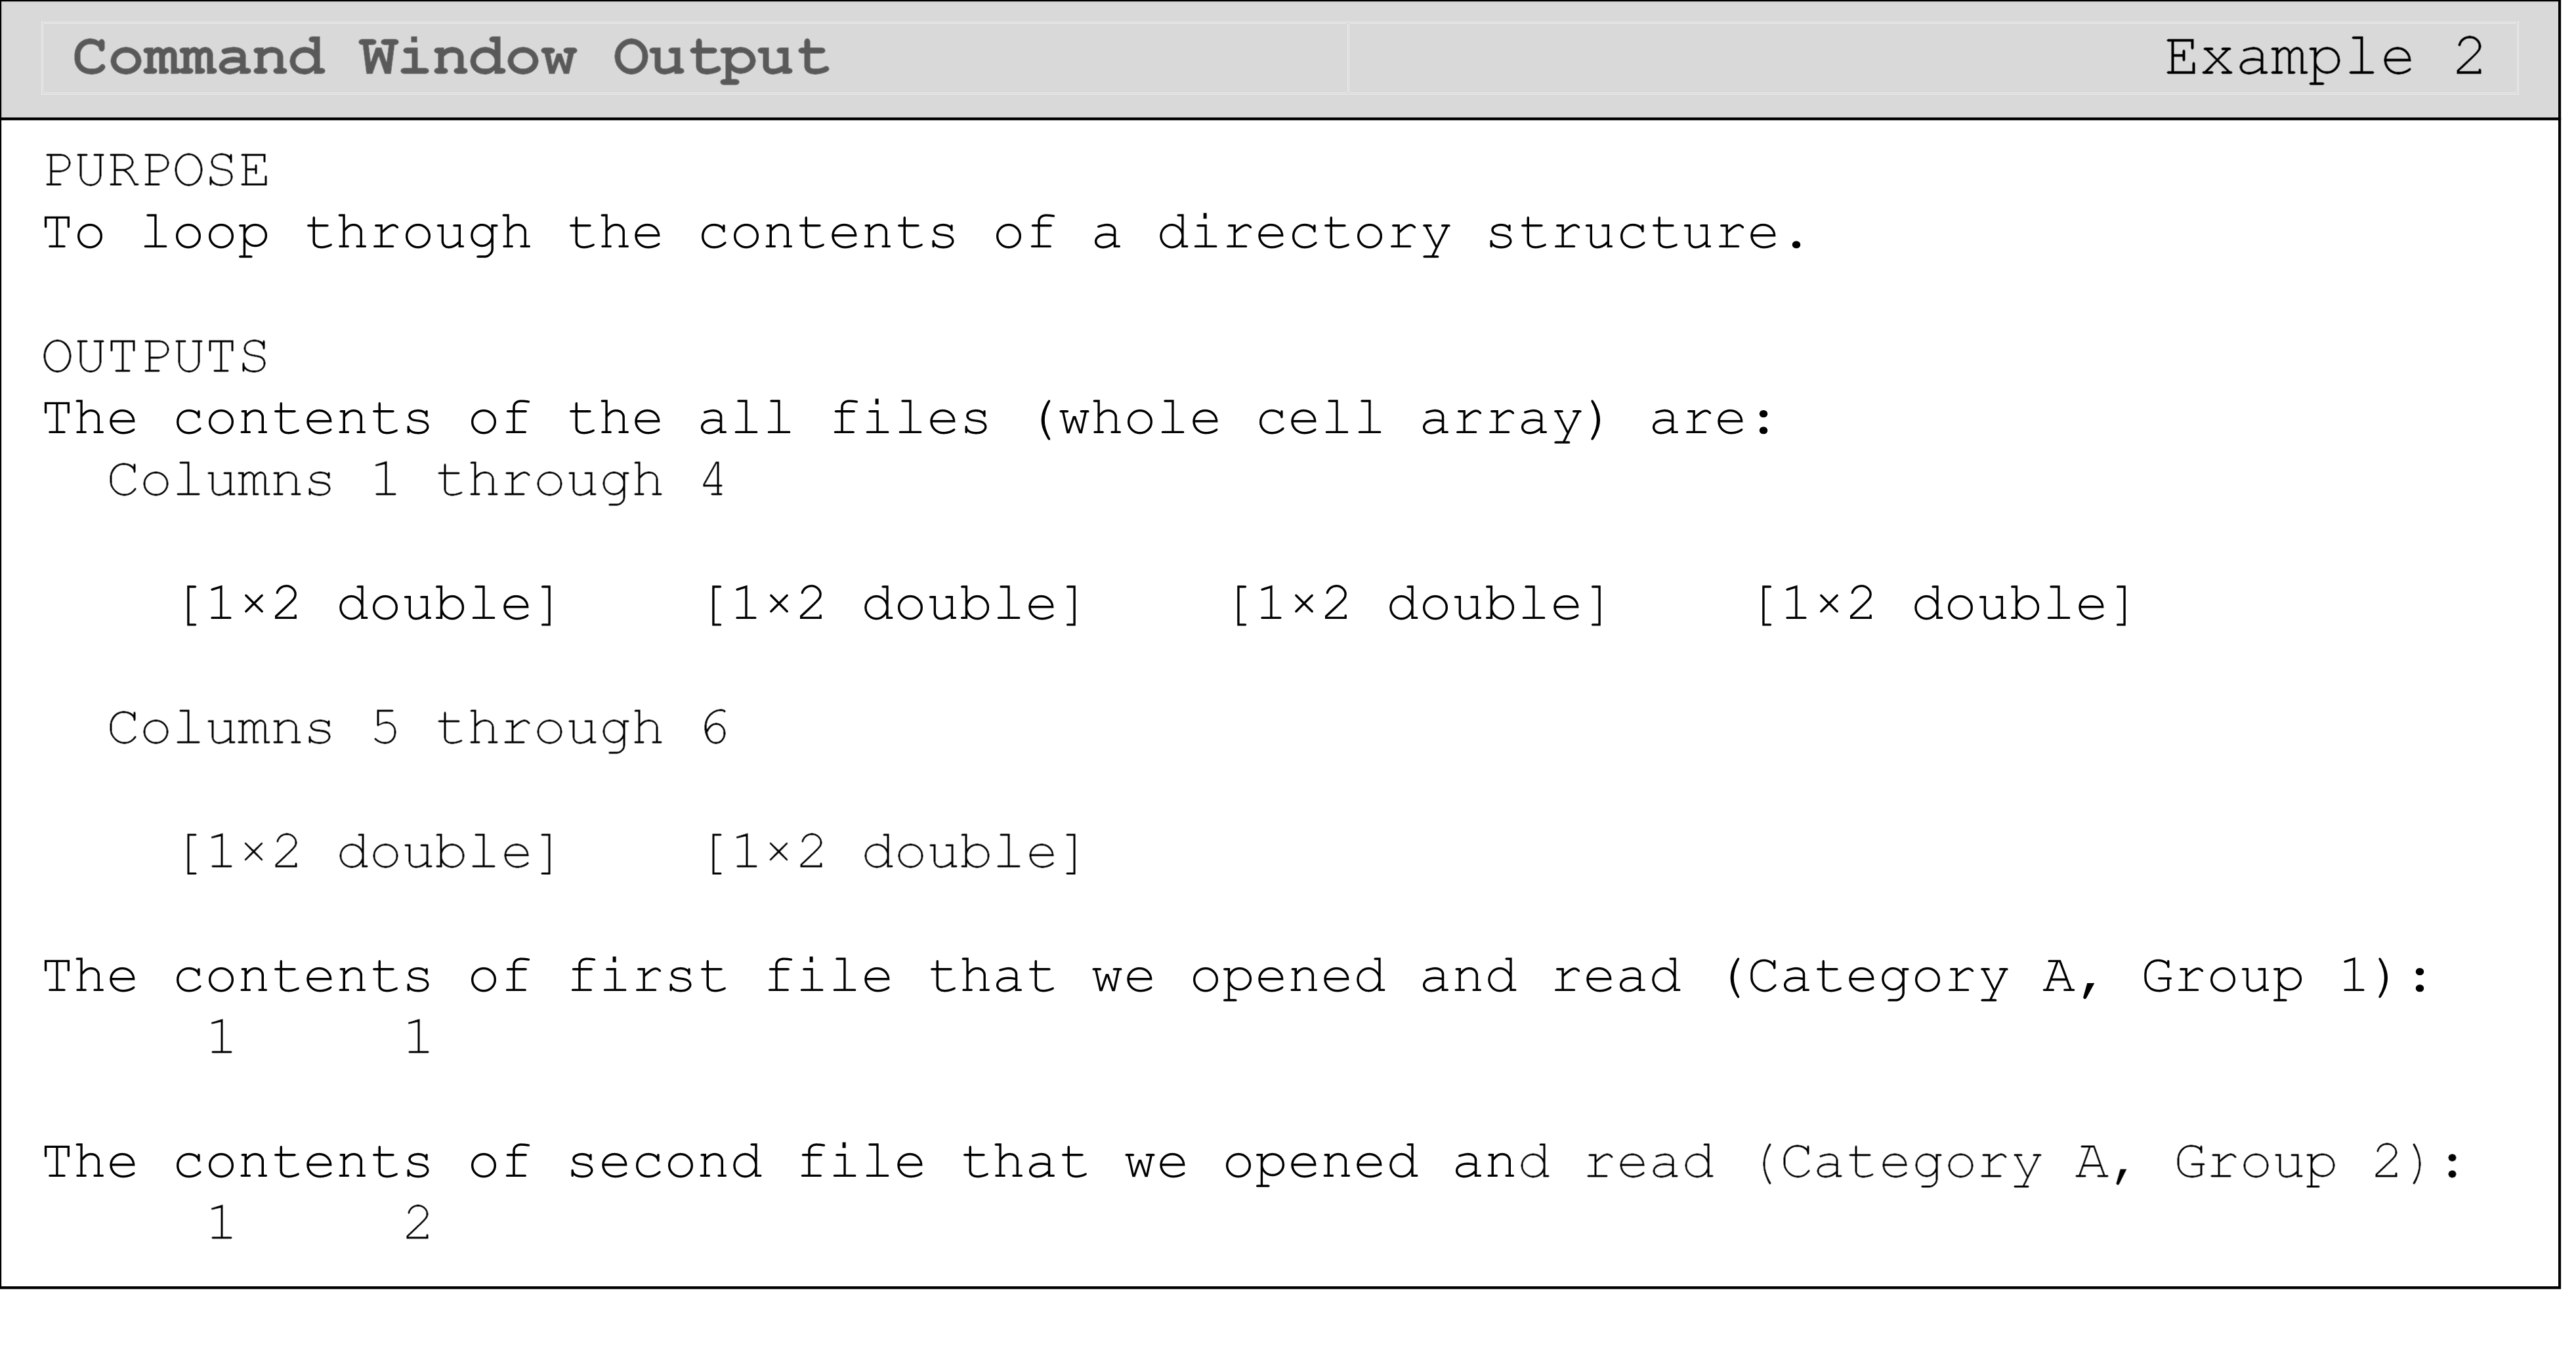
Another way to ignore unwanted files and/or folders is to use the
wildcard character, *. You can see this in Example 2 where we ignore
files that are not text (.txt) files. The wildcard character can be
used at the beginning or in the middle of a file/folder name. For
example, “trial*.txt” would include all files that begin with “trial”
and end with “.txt”.
To make Example 2 a little more compact, we could ignore the hidden
files using the wildcard character with the dir() function. Try
editing Example 2 to accomplish this yourself. Remember to start the
loop from 1 in that case.
Note that the solution given in Example 2 will always ignore the hidden folders. This solution can be useful if you have many different folder names at each level, which would make using the wildcard character less efficient.
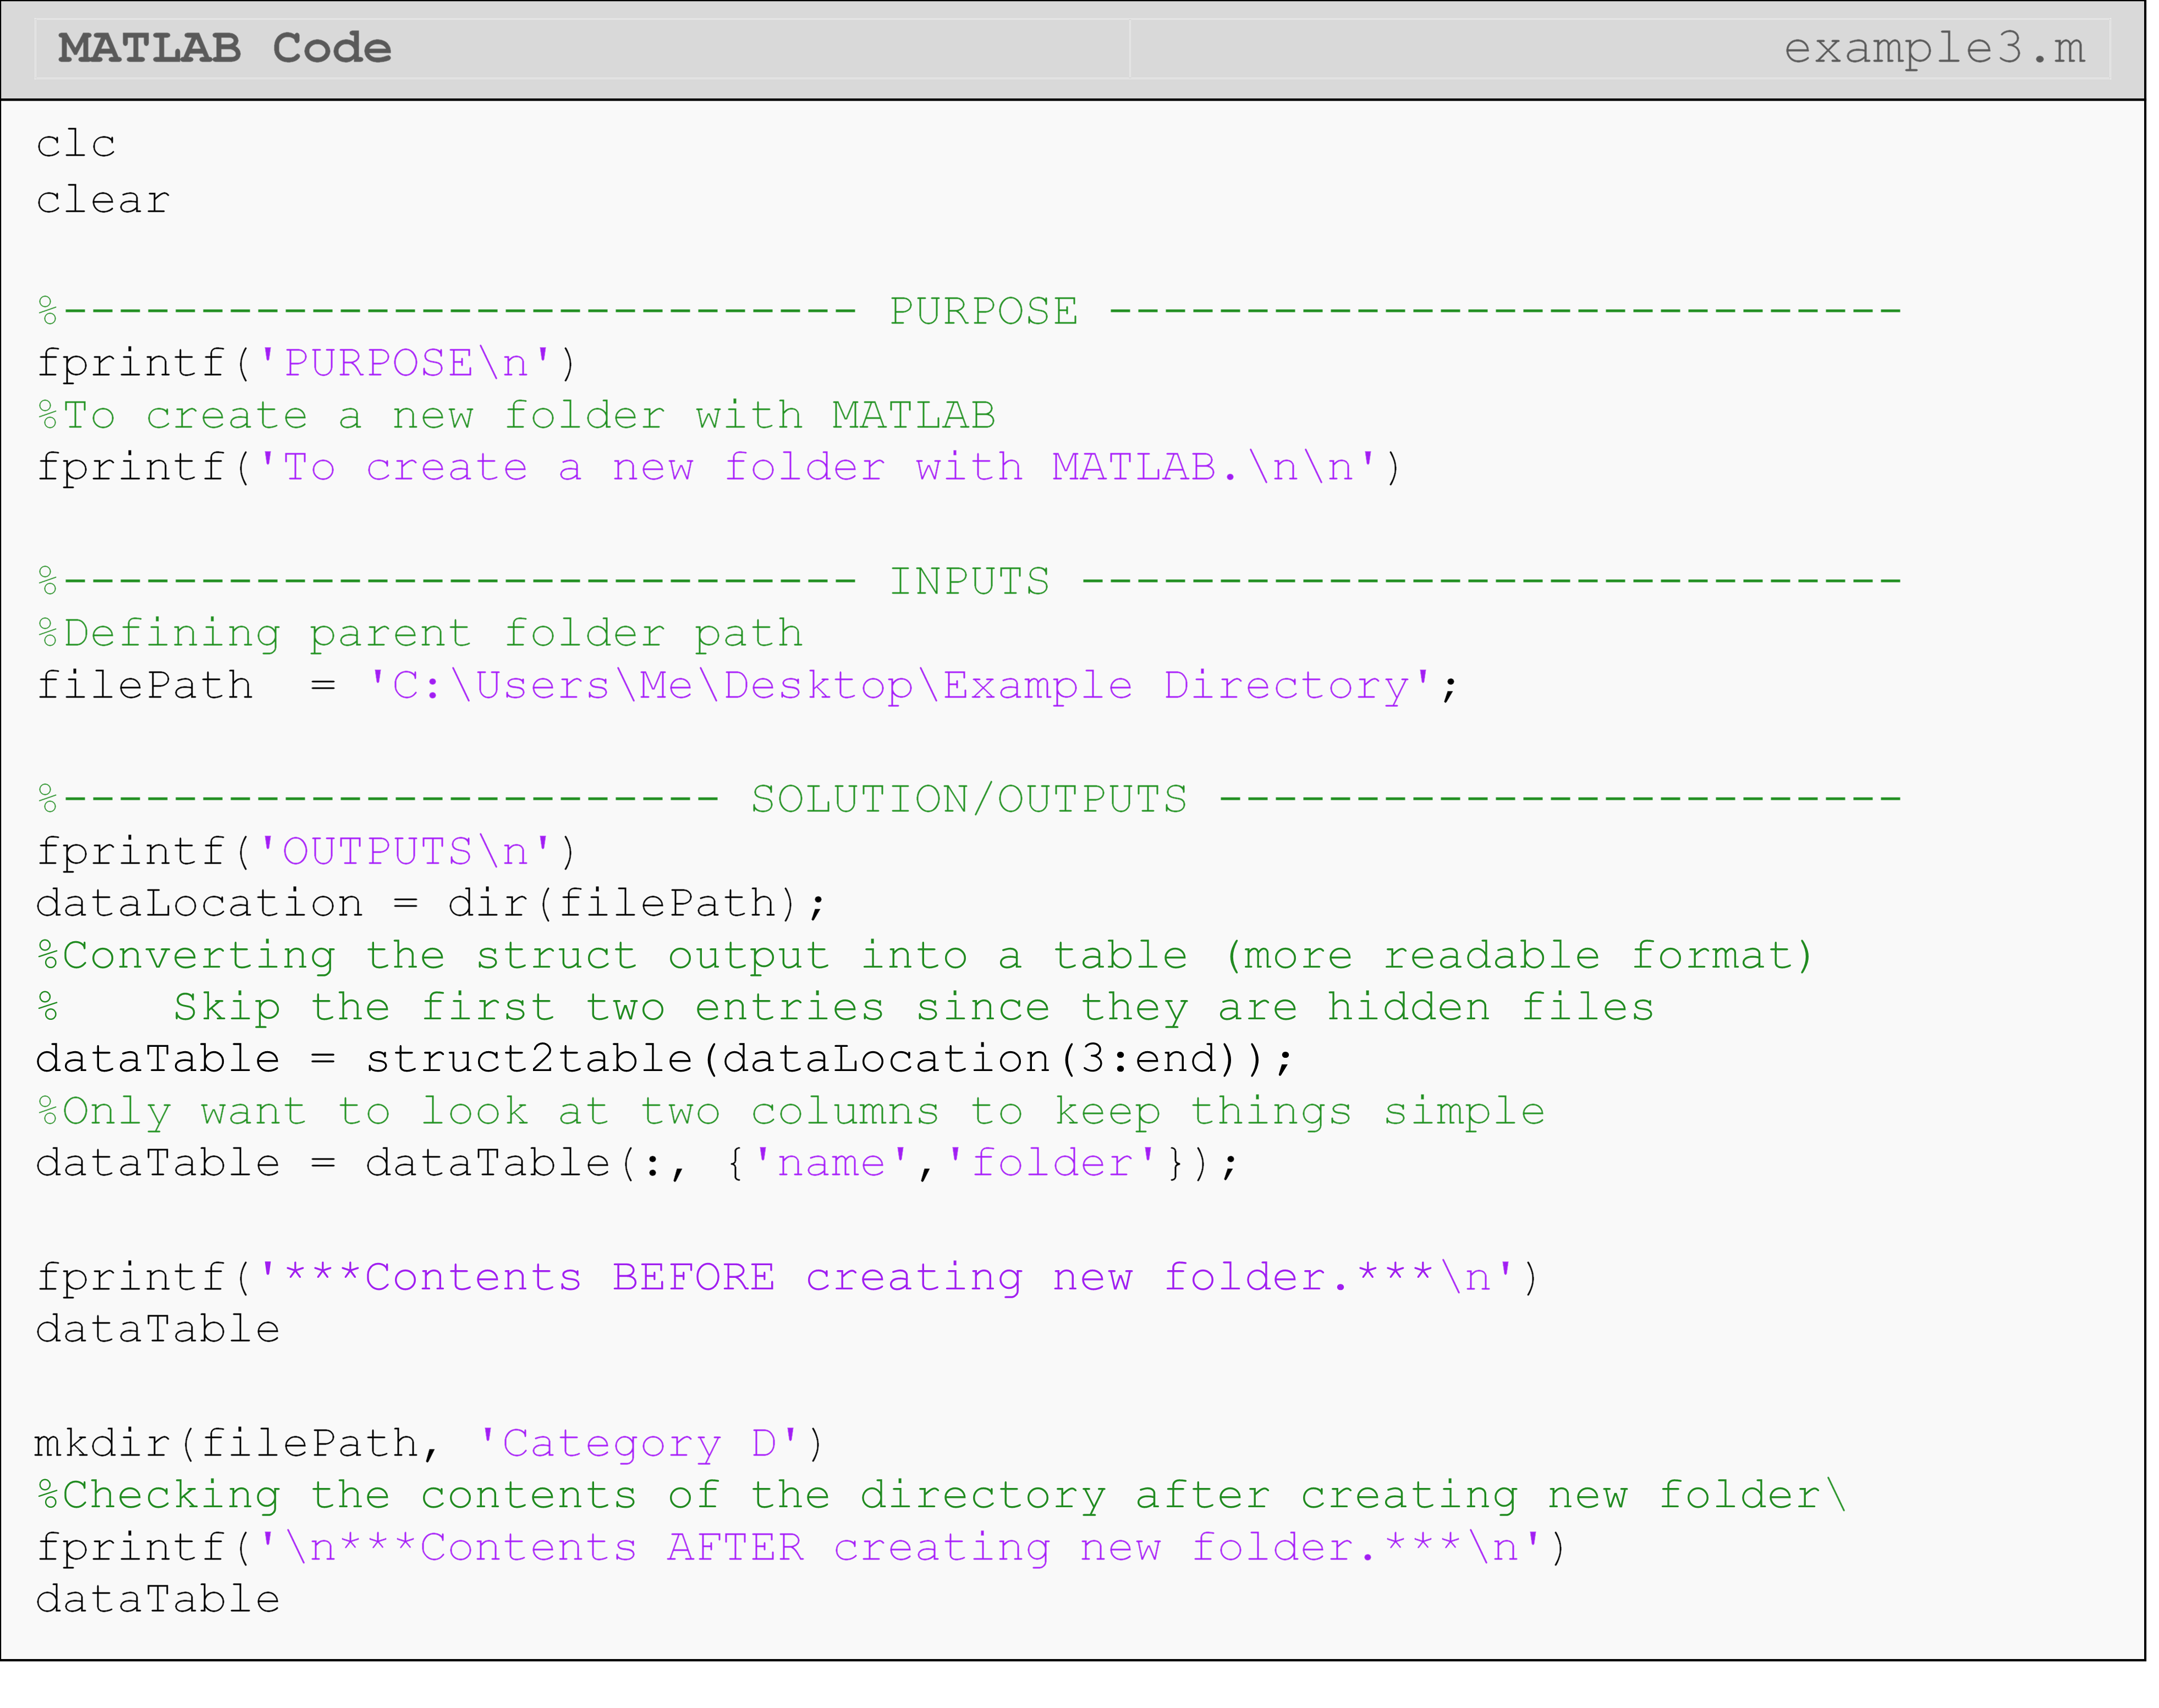
How can I create a new folder (directory) with MATLAB?
We saw in Lesson 9.2 that MATLAB will create a file to write data to if
it does not exist. However, MATLAB can also create directories (folders)
for you using the command
mkdir;
though, it does not do this automatically in most cases. The inverse
(removing a folder) is accomplished with
rmdir.
Important Note: Be careful using
rmdir
to remove directories. Removing a directory using
rmdir
will not send the directory/folder and its contents to the system trash
bin and cannot be recovered!
Multiple Choice Quiz
(1). The pwd command
(a) returns the MATLAB working directory
(b) returns the password for your MathWorks account
(c) returns the password for your Windows account
(d) erases the given directory
(2). The dir() function does not return
(a) the names of the items in a directory
(b) the sizes of the items in a directory
(c) the data contained in files in a directory
(d) whether the item is a directory or not
(3). The dir() function creates a ________ variable that
contains information about the contents of the directory.
(a) struct
(b) string
(c) numeric
(d) logical
(4). The rmdir command
(a) remakes the given directory (erases the contents, but leaves the > folder)
(b) moves the directory to the Recycle Bin (in Windows)
(c) permanently deletes the directory
(d) makes a new folder inside the current directory
(5). The cd command can change the location of the
(a) install directory of MATLAB
(b) executed m-file
(c) current directory
(d) None of the above
Problem Set
(1). In this exercise, you will create the necessary folders and files to test the solutions you write in exercises 2-6.
Recreate the directory (folders) shown in Figure A where there are two levels of folders. Two levels mean one parent folder (like “Exercise 1”) and one level of subfolders called “Level A”, “Level B”, “Level C”.
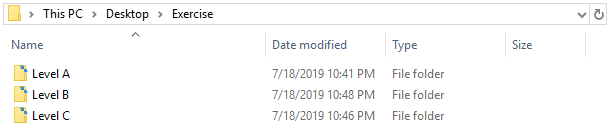
Figure A: Directory structure for use in the excises.
Within each subfolder (“Level *”), you will need to create some files. This should look like those files shown Figure B: two text files and two Excel files inside of each “Level”. In some exercises, you will only read text files or only Excel files. You can easily account for this in your solution using a conditional statement or wildcard character, which were techniques shown and described in this lesson.
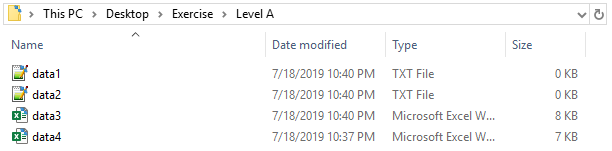
Figure B: An example of what the contents of each “Level” folder should be.
Within each file that you create, you will need to enter some data to
read. Make the data in each file unique, so each file is identifiable
from the data. You can quickly and easily do this by creating the
numeric contents of the files using magic() or rand() in MATLAB and
then copying those numbers to the files. Each exercise will specify
what type of data the files should contain (numeric, non-numeric, or
mixed). Examples of what text (.txt) and Excel (.xlsx) files should
look like are given in Figures C and D.
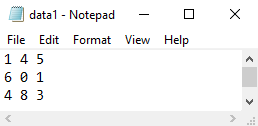
Figure C: An example of what the contents of a text (.txt) file might look like.
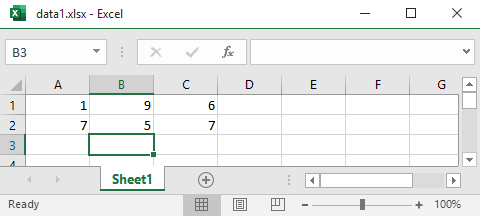
Figure D: An example of what the contents of an Excel (.xlsx) file might look like.
Note: For all the exercises given below, you should write your solutions without hardcoding the names of any of the folders/files you are reading from. Use the appropriate MATLAB syntax to read all the files no matter what the folder/file names are.
(2). Task: Make a struct variable for a folder/directory using
dir() and display info (fields) for that folder/directory in the
Command Window.
Testing: To test this program, input the folder path to one of the folders you created in Exercise 1 or any other folder.
(3). Task: Create a MATLAB function using, in part, your solution from Exercise 2. The function should read data in from the directory (folder) structure with two levels (see explanation in Exercise 1).
The function should read data for all Excel files contained in the folders where the Excel files can contain numbers, text, or both types of data. Display the data in the Command Window.
Testing: To test your program, use the folders and files you created in Exercise 1. Make the contents of the Excel files be labels in the first row and numbers in all the following rows.
(4). Setup: Using the function you created in Exercise 3, read all the data contained in Excel files from any directory structure with two levels (see explanation in Exercise 1). You are told the files contain only numeric data.
Task: Find the sum of each row in each file. Store these sums in a vector in MATLAB, and output the vector to the Command Window.
Testing: To test your program, use the folders and files you created in Exercise 1. Make the contents of each Excel file be an \(\text{n} \times \text{n}\) matrix.
(5). Setup: Modify the function you created in Exercise 3 to read all the data contained in text files from any directory structure with two levels (see explanation in Exercise 1). You are told the files contain only numeric data.
Task: Find the average of each row for the matrix contained in each file, and append the averages to that file.
Testing: To test your program, use the folders and files you created in Exercise 1. Make the contents of each Excel file be an \(\text{n} \times \text{n}\) matrix (You can use the same ones from ).
(6). Setup: Modify the function you created in Exercise 3 to read all the data contained in Excel and/or text files from any directory structure with two levels (see explanation in Exercise 1). You are told the text file contains only numeric data in two columns (size \(\text{n} \times \text{2}\)).
Task: Plot the data on a 2D plot where the numbers in first column are the x data points and the numbers in the second column are the y data points. There should be one line for each file on the same plot. Make a legend that shows the filename associated with each set of data (plotted line).
Testing: To test your program, use the folders and files you created in Exercise 1. Make the contents of each file be two columns of numbers (size \(\text{n} \times \text{2}\)).